(click on the postcards' stamps to see each DIY project in pictures…)


Gaijin-style
Okonomiyaki!

Imagine you're being confined (for some reason) and you long for traveling somewhere exotic and your gorgeous weekly farmer's groceries basket is full of delicious cabbage. What do you do with it?
An all-time yummy classic from Japan: Okonomiyaji. Of course yo won't have all it takes to do it properly, but let's give it a try:
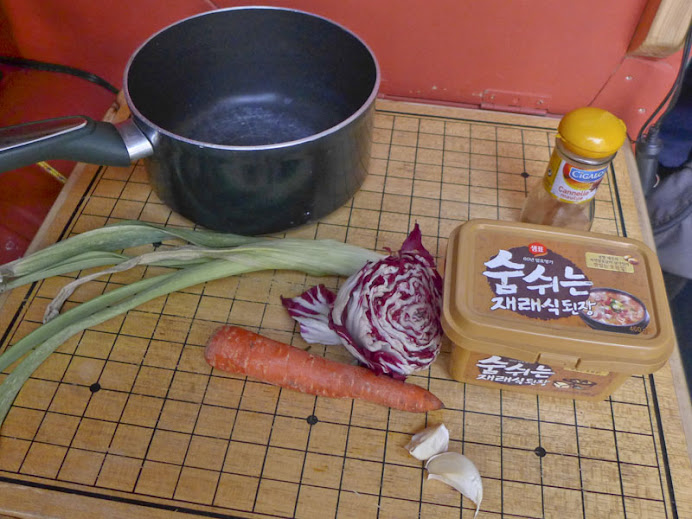
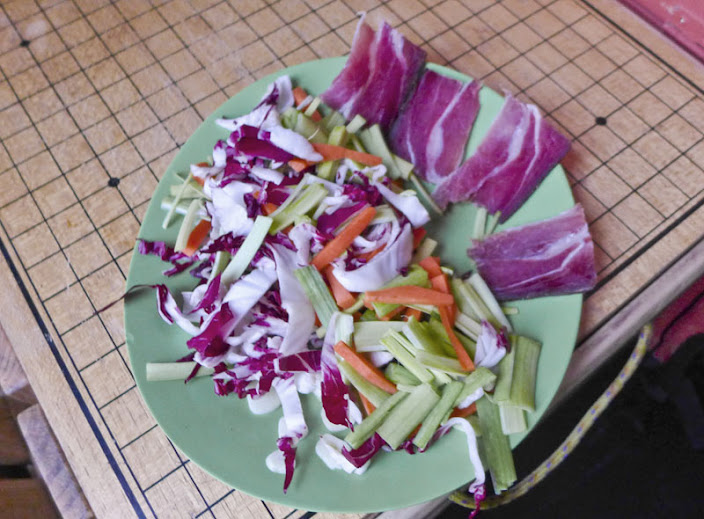
Boil the cabbage leaves 4-5 min in salted water, then cut them in thin stripes (a pair of parsley cissors may help...)
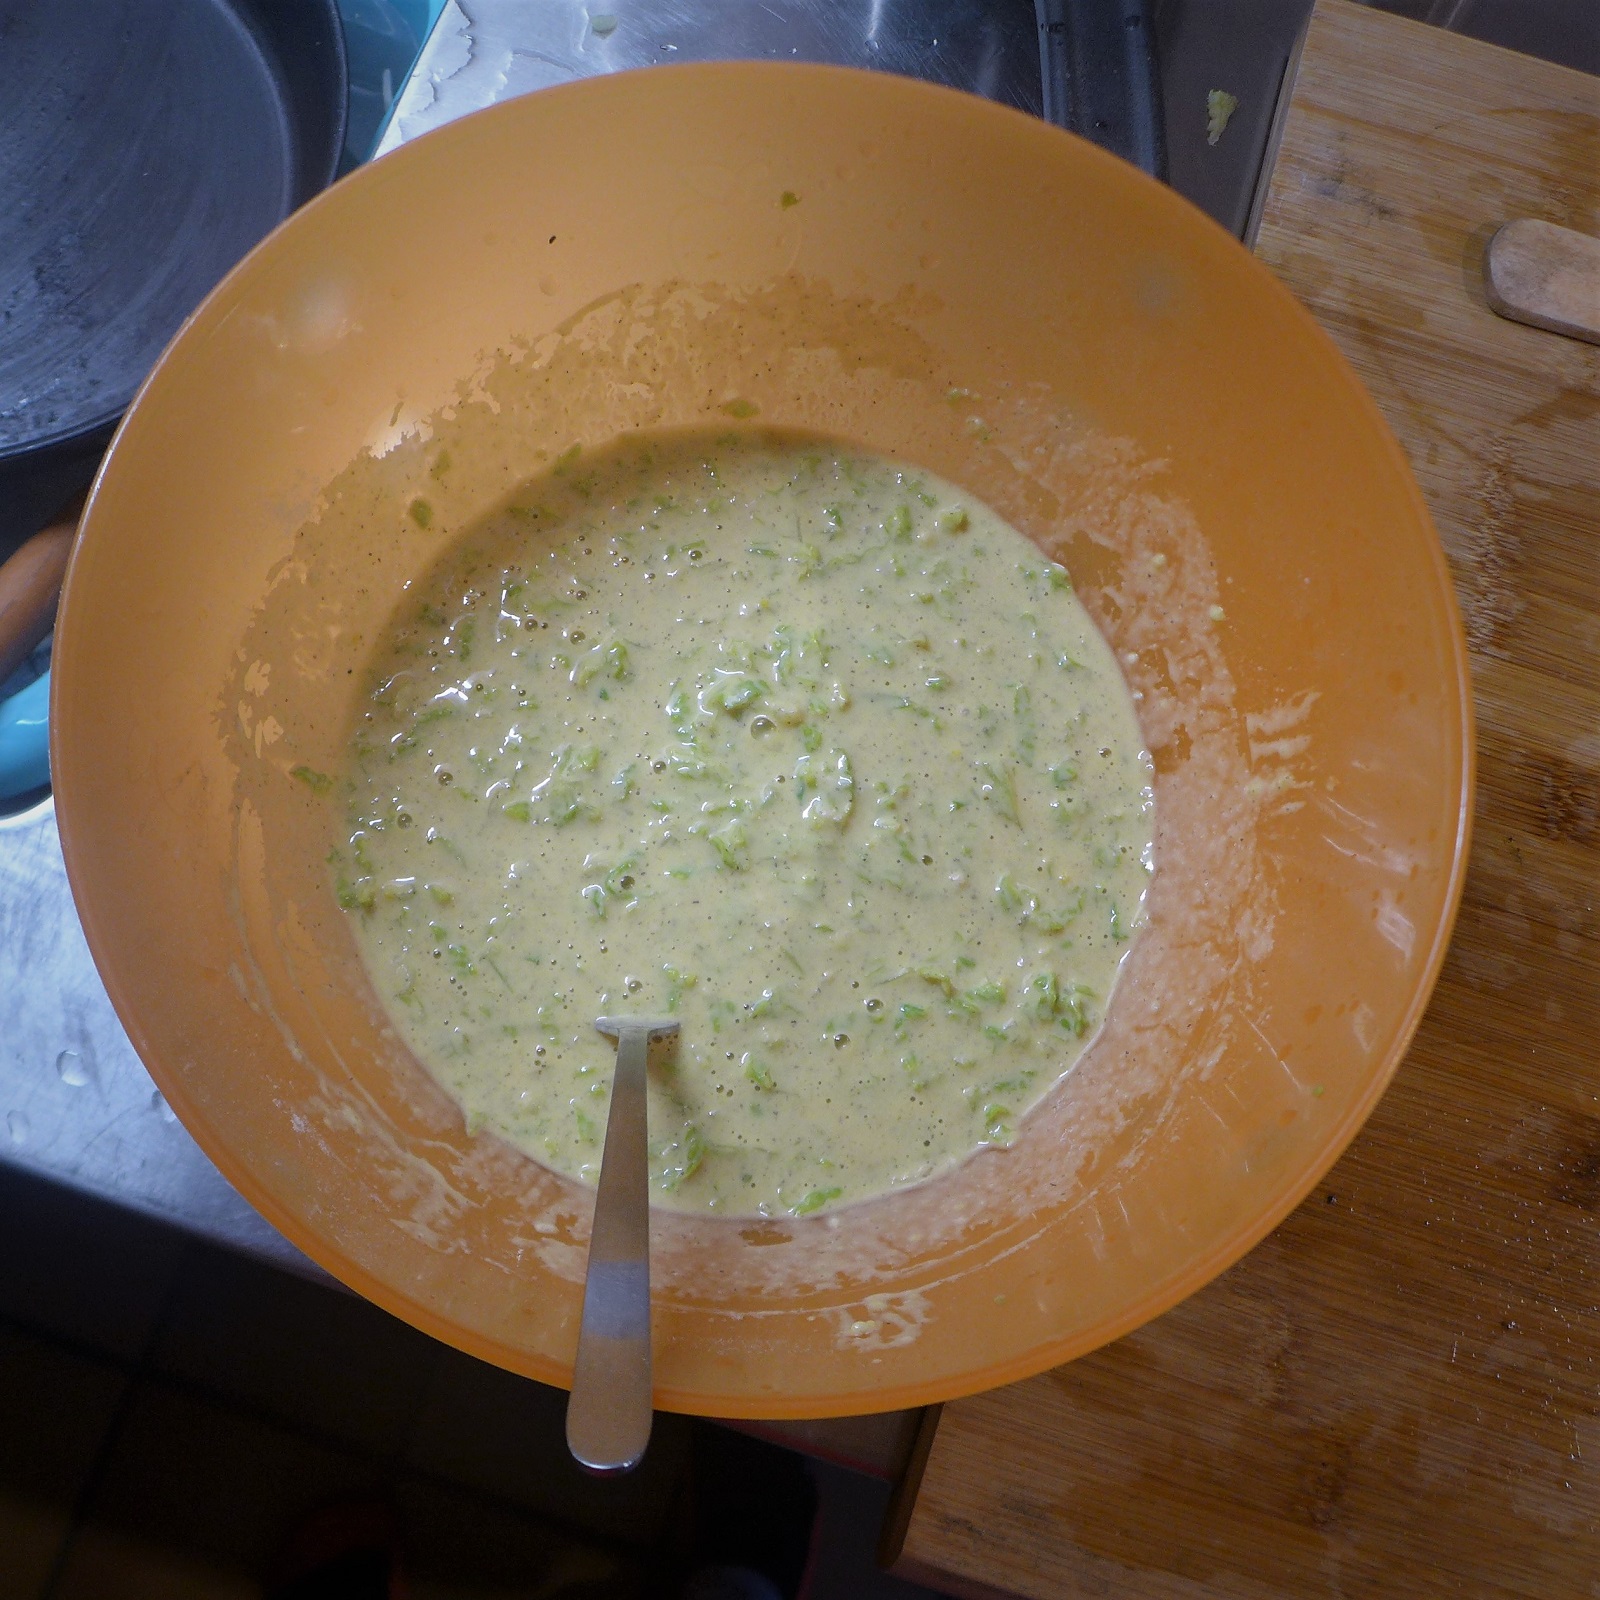
Drain the cabbage and mix it with the flour, the eggs, the stock (pork, fish or just veggie), some soy sauce and fresh chopped ginger. Gently steer til you got a thick, homogenous cream and... Voilà!
Fry on both sides in a pancake pan, serve with the chopped scallions and if you can, add grated dry Tuna and the mandatory Bulldog sauce. Itadakimassss!
supplies:
a cabbage
3 eggs
300 grams of wheat flour
some fresh ginger and scallions
2 tablespoons of soy sauce

you could also use:
Katsuobushi (grated dryed tuna aka flaked bonito)
Bulldog sauce (a kind of Japanese gravy)
Japanese mayonese (or regular mayonese with rice vinegar?)


a TCRS: Tin Can Rocket stove
to upcycle what you usually just recycle! 

Looking for a project for those tin cans we'd been keeping for ages we came across some cool tutorials of a mini-rocket stove for car-camping- or tiny-cabin- cooking! The concept is freaking simple: 
- a big can inside a bigger one, with insulation between the 2 of them, to work vertically as the stove body,
- a third one, horizontal, inserted through the base of the other two ones, as the hearth.
As good heat accumulates inside, combustion is better and allows you to cook from tiny scrap of leaves and branches...
Mark and cut off some holes to insert the hearth inside the other 2 cans, sand them and build the thing, then fill the wall with sand, gravel, ashes, rockwool or cement. Finally cut some (nice) exhaust holes at the top of the stove and make it comfortable for your pans.
Stuff it with a little bit of scrap wood, branches and leaves... try it already!


supplies:
three tin cans of different sizes (XL, L and M)
any fireproof, insulating material
scrap wood, leaves, branches
hammer, pliers, tin snips, drill, metal saw (or a Dremel multi-tool)

you may also want:
one of the many Youtube tutorials with keywords: "DIY rocket stove tin can"!


make a crochet
so you can make crochet

After Wallis expressed her disappointment due to the limited sizes and shapes of knitting needles and crochets available on the market, Futuna decided to make some for her, of the features she needed to knit cool scarfs: thick, long and double-hooked.
Living in the mountains (where trees grow wild and nobody ever reclaims their wood), salvaging branches is fairly easy. Futuna soon discovered something he'd been doing for hours as a child was the key to making crochets: peeling off the branches' bark and sapwood with a knife, then making the heartwood a level and even stick with rounded end(s).
Finally, the hook itself is shaped as a "smile" you then cut at a 45º angle and half the thickness of the stick. After a little more peeling and levelling the gorge below the smile and careful sanding to let the whole stick smooth, you can olive-oil and dry it (by the fire or heater) for a couple of hours before use... Voilà! Send your pics of custom crochet projects!
supplies:
 hazel, beech or ash tree branches
(any other should work fine, though)
any chisel, knife and/or exacto
(a pocket knife will work wonders)
two tablespoons of olive oil
(or any other vegetal oil)
sand paper for the finish
(I use coarse 60 and "fine" 120)

you may also need:
a bonfire to dry the finished crochet
somebody to knit/crochet with your
exclusive products (consider selling them at a local store or market!)


a spool night-table / lamp
upcyclin' 'til we have nothing left to upcycle! 

We all used (or desperately wished to get rid of) the average coffee-, night-, porch-, whatever-it's-meant-for- table made of an industrial spool. Some are huge, others are tiny and most of them are never quite flat, often dirty or splintery for nobody bothered to spend a couple of hours on them. So, this project features a small spool whose axe is of thick cardboard, hence the decision to cover it with the Dos Pasos pages we already used for several project on this section. After sanding and papier mâché-ing it, we found an old plastic lid that fitted the top hole and worked as a mount for the socket. We screwed the wheels, oiled the top and just put some thin wooden rods to prevent the books or whatever items from falling. We ran into a simple, neutral lampshade, put it by the bedside and called it a project! So, how do you like it?


supplies:
a wooden electrical wire spool
these old Dos Pasos book's pages 
four basic wheels for furniture
an old bulb, socket and switch set
wallpaper paste

you may also want:
a little bit of olive oil, wax or barnish
 (for the finish of the wood surface)
any lampshade you find appropriate


give a citric flavor 
to your afternoon snacks...

Tasty and creamy, lemon curd is happy on a cake or inside a yogurt! An original present to bring when invited to someone else's house; Put the butter into a heatproof bowl. Sit the bowl over a pan of gently simmering water, a bain Marie. Stir the mixture every now and again until all of the butter has melted. Add the lemon zest and juice and the sugar.
Whisk the eggs and egg yolk and stir them into the lemon mixture. Whisk until all of the ingredients are well combined, then leave to cook for 10-13 minutes, stirring every now and again, until the mixture is creamy and thick enough to coat the back of the spoon/fork.
Remove the lemon curd from the heat and set aside to cool, stirring occasionally as it cools. Once cooled, spoon the lemon curd into sterilised jars (=jars in the oven at 180 ºC and lids in boiling water for 10 minutes) and seal.
supplies:
3 lemons (zest and juice)
115 g of butter
250 g of sugar
3 eggs
1 spare hour


you may also like to know that:
instead of the 3rd lemon,
you can use a couple of limes

better keep it in the fridge until use!


a cork table-mat
made of (old and dyed) wine bottle corks

as we live far from many of our friends and we don't want them to forget us, we think of ways to stay in their day-to-day lives. for example, by asking them to keep items such as wine corks for our recycling projects, so they can drink a glass for us every time they open a bottle of wine!

this is such an easy project that it doesn't need any written instructions. only a couple of tips:

- when you drill the corks, try to stay at the same height if you want to have a (more or less) plain surface!
-in case you didn't follow tip number one, you can sand the thing down, but be careful, not all the corks are made of cork!


supplies:
wine corks, if many colours, even better!
metal wire to give the desired shape 
thread, as outside rustic decoration 
(or to attach them stronger if necessary)

you may also like to know that:
if the shape you want is a circle, using an outside embroidery hoop is a good option! 
dyeing the corks in other colours
can give a very special effect.


upcycled nightstand:
- the revenge of the fruitbox -

Our first "handmade with love" was an upcycled coffee table made out of a fruitbox and a 'marble' board salvaged from the street on the same night, riding our bicycles home (see page bottom). 2 and a half years after comes the revenge of the fruitbox. This one is a very simple nightstand, like the ones found at any grandma's...
Sanding and treating/barnishing the fruitbox is about the hardest part of the job. Then, you may want to cover the inside with papier mâché technique: we happened to have pages from this whole John Dos Pasos' novel (see the Stash boox project, right below this one).
A standard 6-bottle winecase fitted the fruitbox perfectly, so we just cut a handle off and screwed two cleats as guides and a cork as a top/stopper, and that was it.
All we need now is somebody to give it to!
supplies:
an old fruitbox
a winecase or an old drawer
any salvaged cleat or slat
"feet" or pallet cubes
nails/screws
saw, hammer and screwdriver


optional:
pages from an old book
and 'cellulosic' glue
for the papier mâché finish


the Stash Boox
 (an old favourite classic) 

We tend to agree books should be respected... but we've had this one for years, never read it, tried hard to give it away, so after weeks at our book-crossing corner, we decided to act!

Easy project, only takes patience, ruler and x-acto cutter. Get rid of all printed surface, only sparing the margins. Cut through as many pages as you can in a row but be precise and clean. You don't want to be messy. Keep some pages on  top and bottom, so the book can still be opened and "looks" real. When you're done cutting, glue all pages together (not one by one but almost... it's long!) until building a solid frame, then let it dry with weight on it so the glue penetrates. Make sure to let some 'buffer' pages because if EVERYTHING sticks together, it won't be fun at all... Put it on a bookshelf with other books: Voilà!
supplies:

 - an old fat book:
the older and the thicker,
the better!
 - a metal ruler
 - an x-acto cutter
 - papier maché glue
(a.k.a "fish" or wallpaper glue?)

extras:
a glass of red wine and some olives


a scrapbook
out of a stack of sheets...

You maybe decided to stick back to this good habit you used to have: writing, scrawling, sketching, scribbling but you can't find the right, perfect notebook to spit all your inspiration out? Make your own one!
First of all, you need to gather some sheets and cut them all to the intended size. Pile them up, add the covers on top and bottom and clamp it all. Using a ruler and a pencil, mark the holes through which the needle will pass. If your book is going to be very thick, you might consider marking and punching the holes in several sets. The diagram explains how to bind a four-hole book but it works for any number of holes. 
Now, you can stop procrastinating once for all!
supplies:
spare sheets, two covers,
a pair of scissors, a ruler, a pencil
linen or waxed thread
a clamp, 
a tapestry or bookbinding needle,
a punch, an owl or equivalent tool
(i.e. hammer and nail).

you may also like to know that:
when something is quickly done, the  proverb says it happened "in less than it takes for a rooster to crow". that's it! 


Composting box II
 - the revenge - 

After a first version built out of an IKEA futon frame (R.I.P.) for dear Arnaud's garden (find it lower on this page), we needed another one for our own brand new orchard. Composting your food wastes, garden weeds and green by-products is practical, convenient, easy and it really makes sense if you're gonna try and grow plants and food. It's ecologic and reduces drastically the amount of garbage you produce and throw away...

Okay, so: how? Gather 2 half-size pallets (the sides) and 2 regular ones, whose low slats and cubes you'll remove. Saw one board off one of them, so it matches the sizes and nail them all together. Firmly nail a salvaged piece on the back of each side (see pics) to receive the lid. An extra board on the back gives more rigidity and shape. Finally nail 2 cubes under the lid and screw through these brackets and cubes with 2 strong screws. In about a half hour, you should have it ready!
supplies:

some pallets (we used: 2 small ones for the sides and 2 regular ones for the front and lid, plus 2 pallet cubes and an extra slat, salvaged from the big ones,
some pallet nails
2 big thick screws (6 x 120mm approx.)
 a saw, a hammer
and just a bit of sand-paper

extras:
a glass of red wine and some olives
a garden or orchard to use your box


Book-Crossing...
yes, please: in my backyard!

The challenge here was to get rid of some old books in a fun way. Since we just moved in small flat with garden and knew nobody in the village, we decided to create a book-crossing corner in front of our place. Basically a waterproof place where everybody can bring books they don't wanna keep or wish to share and find a free book to read. Nice and easy. So, how to?
First, gather the books you don't want no more and evaluate the size of the book-crossing corner (our turned out to be way too small in just a few days). Then cut and rebuild the wine case into a cute little bird house, paint it and once dried, stuff it with books. Screw it securely in front of your house, where people can actually use it. Hiding behind your kitchen curtains, try to take pictures of the readers...
supplies:
a wooden wine case,
a few nails,
some old paint or barnish,
pliers, hammer and sand paper,
a chain or lock,
some books to cross.

you may also want:
a warm coffee with milk
a garden


How to enjoy a
mini-calçotada
First of all, you need the calçots (which can only be found in Catalunya during winter time). Prepare the fire and sew the calçots on the wire like pearls on a necklace. Cook them while there are still some flames: the outer skin will burn and will (somehow) protect and stew the rest. Use the wire to move and return them easily.

Try not to wake the cat (it's an old saying). Oups! Too late...
After a while, they're ready. Grab them and keep them in a newspaper so they keep warm and they don't dye everything around in black.

Get to the table with your calçots. By the time you get there, the skilled Catalan should have served the wine, prepared the wonderful "salbitxada" or "romesco" sauce, the allioli, the meat, the salad and the bread with tomato. Enjoy your calçotada!
supplies:

some Catalan calçots
a barbecue or bonfire
a cat
an iron wire
a skilled Catalan

extras:
allioli (garlic + olive oil), meat,
red wine and all you want...


tiny pallet shed...
(for our parents' garden)
The challenge behind this hmwl was to gather raw materials, design and build a little garden shed for my parents in about... 2 days! We drove around the village just long enough to gather 6 pallets of different sizes. We were lucky enough to find a couple of nice long battens too, which we used for structure and door frame. We upcycled some spare pieces of green clapboard for the cover. So, how to??
First, choose the pallets you want to use as is and carefully dismantle the others, trying hard to save all the pieces and some nails. Sand as little as possible, just to make edges clean: remember we got no time...
Now take a piece of paper and be creative! Nail/screw everything together. Reinforce what needs being reinforced. Cover with clapboard and pieces of pallet. Give the roof some inclination and make it waterproof.
supplies:

up-cycled old pallets: the more you get, the better you build,
spare wood pieces and clapboard,
screws and nails,
a piece of strong waterproof fabric or plastic for the roof,
pliers, hammer and screwdriver,
meter, spirit level and sand paper.

you may also want:
a warm coffee with milk
a garden


Miso soup 
al Contadino
Warm up the garlic, cinnamon and chopped speck in the pan until it releases some fat then stir fry the veggies cut into a julienne (3-4cm thin sticks). after about 5 minutes, add 2 generous tablespooons of miso paste and mix it with the rest. after another 5 minutes, cover with a liter of water, put a lid and wait until it boils. uncover, count 3 to 10 minutes whether you want the veggies still firm or softer. do not add any salt: speck and miso already bring a lot!
Our favorite van, outdoor or camping dinner soup: FLaSH soup (Fast, Light, Simple and Hot). miso is a nice alternative to the old dehydrated soup cubes and supposedly very nutritive. chinese dehydrated mushrooms and/or rice noodles are lightweight great variations.
ingredient(e)s:

leech (puerro, poireau)
carrot (zanahoria, carotte)
cabagge (col, choux)
beans (judías, haricots)
garlic (ajo, ail)
miso paste 
speck (salted-smoked-pork chest, intradu(c)ible)    
ground cinnamon (canela molida, cannelle en poudre)


Up-cycle your jeans
(All those pairs of old trousers that are just waiting to have a new life...)
The basic idea behind this skirt is to open up a pair of jeans and set a small triangle of fabric into the back opening. The front will be done by folding over the original crutch piece and stitching it. Mark the length of your skirt and cut across both legs. Rip the inside front and back seams up until the zipper. Pin the front of the skirt so it fits, placing the two front seams together overlapping them to one side (be specially careful on the curve so it lays flat). Onto the back: take one of the cut-off legs, fold back the back inseams and put this piece into place. If you want to leave the edge raw, just do it. If not, turn your skirt inside out and hem it.


This skirt was finished thanks to Jeanny and her sewing machine. Thanks a lot!
supplies:

pair of old jeans you don't put that much
scissors
pins
thread
needle
sewing machine

a sunny piece of grass to sit peacefully


How to teach a hen
to play dead
First of all, you needa' get yourself a hen. Help it put the head under the wing and swing it gently back and forth. The longest the cradling, the snooziest the hen, 10 seconds is more than enough. Now the question is, why would you want to do that? Oh, no, no, the question is... who cares?! 


No hens were harmed during the making of this post.
supplies:    

a live hen


3Rs kitchen clock
(recycle it, reduce it, reuse it)
This is a 15-minute really nice DIY i've done many times... Easier and more fun, impossible. Whenever you get tired of your (or find an) old clock, remove its mechanism. You generally only need small pliers to unscrew the axis off the board. Pick a tin board - in this case an abandoned chemical tap from A's basement - and prepare it the way you want: sand it, clean it, paint it, tune it, write on it and finally barnish it. when it's dry, put up the mechanism on it; that's when you need to drill or hammer a hole. Put a battery and hang it to change your home design!
supplies:

clock you don't like so much.
wooden or tin board you like better
(can be any size, any shape).
drill or hammer and big nail.
screwdriver and pliers.
cray, paint or pen.
acrylic barnish.

1 mug of coffee with milk


COOKIES LAB 
experiment #2 orange & cinnamon
Mix all the ingredients except for honey until you get a crumbly mixture. Add the honey, the resulting dough should be stiffly (heavy, compact but not friable). Pre-heat the oven at 190ºC. Meanwhile, make little balls the size of a walnut and press them gently on the baking sheet or tray (these won't easily spread during baking, don't know exactly why…no egg? less sugar?). Bake for 10-12'. The cookies tend to be soft when you get them off the oven, it's normal!! They get solid after a few minutes.
ingredients:
110 g flour
1 grated orange skin
50 g  butter or margarine
30 g brown sugar or  vergeoise brune
1,5 teaspoon cinnamon 
1 teaspoon bicarbonate of soda 
a pinch of salt 
2 teaspoons honey  
or "as much as you like"


Handmade rings
(with love)
Instead of using coins to buy stuff, let's make stuff from them instead! We found this on internet (what do you NOT find there?) and didn't really believe it would work. So we tried... After a few minutes, the edge gets thicker, so you take the coffee with milk and keep going for a while. The inner diameter shrinks: the smaller the ring, the thicker. Once it's okay, drill several small holes until you can enter a file and start emptying the center. You keep working until it's perfectly clean and smooth. File, sand and finish... Voilà!

supplies:

1, 2 or more old coin(s)
any currency is good
the silver the better...
hammer and anvil
drill and metal bit
metal file(s)
sand paper for metal

2 cups of coffee with milk


GORROWS !!
Before setting off to un(t)raveling, I decided to learn knitting so we'd always have a handmade, easy-to-do, good-feeling maker gift, even on the road. A hat looked like an easy thing to start with and it was niiice, useful, warm! I found several hat patterns on the net, but didn't have a clue about how to read them. One sunday morning, my friend Àlex had the patience of teaching me how to do it and since then I knitted a handful of them for our beloved friends and family! This pattern was designed by Alicia Bergin and is available at ravelry.com

supplies
one cotton yarn (ca.100 gr) 
a 6.5 or 7 mm-sized hook

abbreviations:
ch - chain
sc - simple crochet
sl st - slip stitch

pattern instructions:
download the pdf here


COOKIES LAB 
experiment #1 chocolate & ginger

Combine the butter and the chocolate in a small glass jar. Waterbath heat the glass jar up, stiring occasionally until the chocolate and butter melt. When the mixture is smooth, set it aside to cool slightly. Stir the sugar and melted chocolate mixture into a bowl, drop the eggs in and mix it all briskly until smooth. Gradually incorporate the flour/cocoa mixture, salt, ginger, and cinnamon. The dough should have the firm consistence of clay. Cover it with plastic wrap and set in the fridge for 2 hours. Preheat the oven at 190°C. Shape the dough into walnut-sized balls and line them in 5 cm apart on baking sheets. Bake for 10-12 minutes or until the cookies have spread and the tops are cracked.
ingredients:
1 egg
100 g of unsalted butter
300 g of a flour-cocoa powder mixture at a 3:1 ratio
100 g of sugar (brown or white)
1/2 teaspoon salt
1,5 teaspoon ground ginger
1 teaspoon ground cinnamon
100-150 gr chocolate (70% cocoa)

suggested variations:
try them with choped wallnuts,  with freshly grated ginger or hazelnuts.


LES COCHONS DE LACAUNE!
(Settlers of Catan limited edition)
Although we are not addicted gamers, we kinda love a Settlers of Catan every now and then… We never had one on our own and instead of buying, we felt like DIYing one. With the pretext of my sister's birthday, we decided to make a collector version: "les Cochons de Lacaune". She lives with her family in a small rural town named Lacaune, famous for its many charcuteries: ham, sausage and other pork stuff delicatessen. Our edition of the game had to use new ingredients, pork-oriented items to build and instead of the trading ports, we placed on the map the main neighbouring towns, such as Toulouse, Millau or Albi. Handmade with love!
supplies
paper, carton, wood
watercolours and ink
wallpaper glue and plastifier

warning:
we do not owe any copyright of Settlers of Catan: 
our version of the game is for private use (and fun) only!

Visit Settlers of Catan.


RECYCLIN' BEFORE LEAVIN'
give'm a second life then give'm away!
The last few months before we left Barcelona, we needed to reduce our stuff. Like, badly. This was both a healthy challenge and a pleasure because we had to imagine ways to reduce and/or recycle, and because things we loved eventualy met people we loved. Here's an example of an old fruitbox picked on the street, one of many objects my Diogenes' syndrome makes me gather and store forever. After fixing, sanding and 2 layers of dark barnish, we turned it into a cozy coffee table with recycled rubber wheels, marble tabletop and drawer (both from the street too). It landed in U.'s livingroom on his birthday, we they've benn living together happily ever since!
supplies:
fruitbox, drawer and marble tabletop (salvaged on the street)
spare wood pieces 
four rubber wheels 
vintage knob screws and nails
250ml of dark barnish
…and a rainy afternoon

liked our fruitbox project?
find many more here!


No comments :

Post a Comment