Under his professional supervision, we sanded all the rusty welded junction, cleaned it, filled it with polyester filler resin, orbital sanded it, re-filled it with polyester filler, re-orbital sanded it and finished it with 280 sand paper before primering and spraying it in a same same… but different ivoryish touch of glossy white.
 |
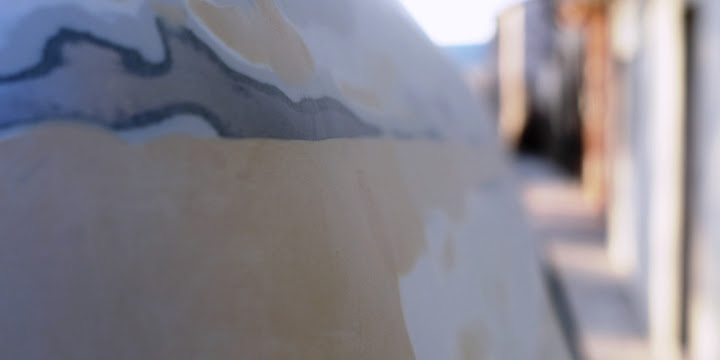 |
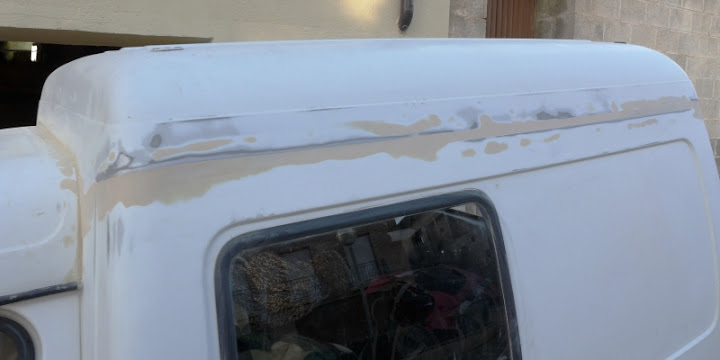
| "Plastic Surgery", a piece for filler resin and orbital sander. |
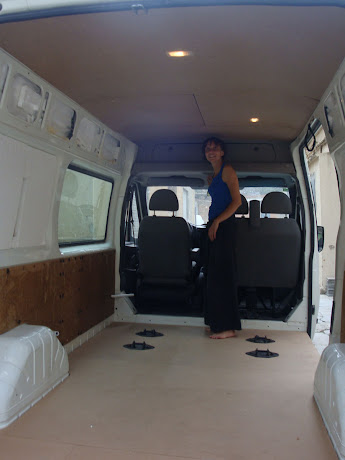
After this parenthesis of “waterproof your car like a pro”, we went back to work on the inside of 2C15: set the floor and roof, finished to cut the side panels, completed the right side frame and wired the second battery and power to come.
 |
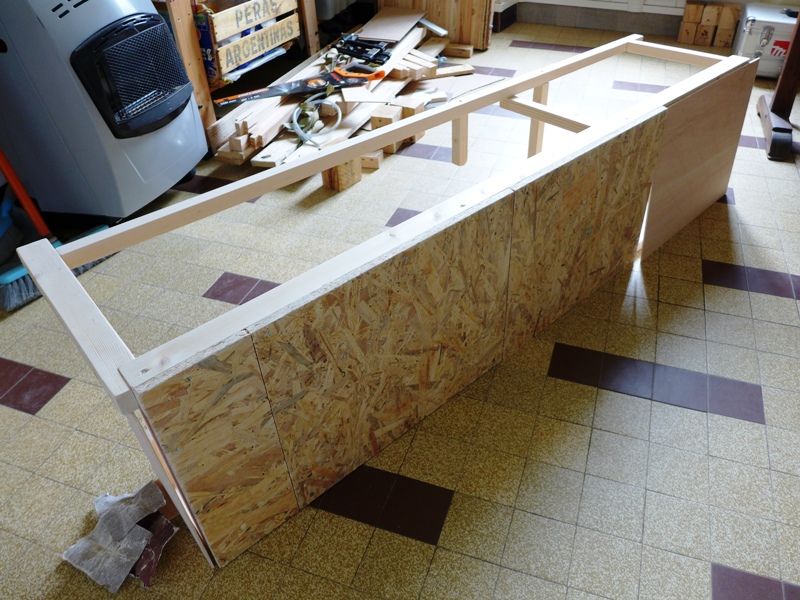
| First cut of the plywood side panels, before sawing the windows off. |
And another late session to get things done... All this thanks to M. and his magic
workshop! So we'll just say it again, once more, because you never say these things too much nor too often: "Thank you so much dear M. for your help, friendship and company! You already know this but "Nuestra casa es tu casa", even though it may only be a van or a shack somewhere remote and untraveled ; you'll always be welcome wherever our home happens to be... Voilà, c'est dit...
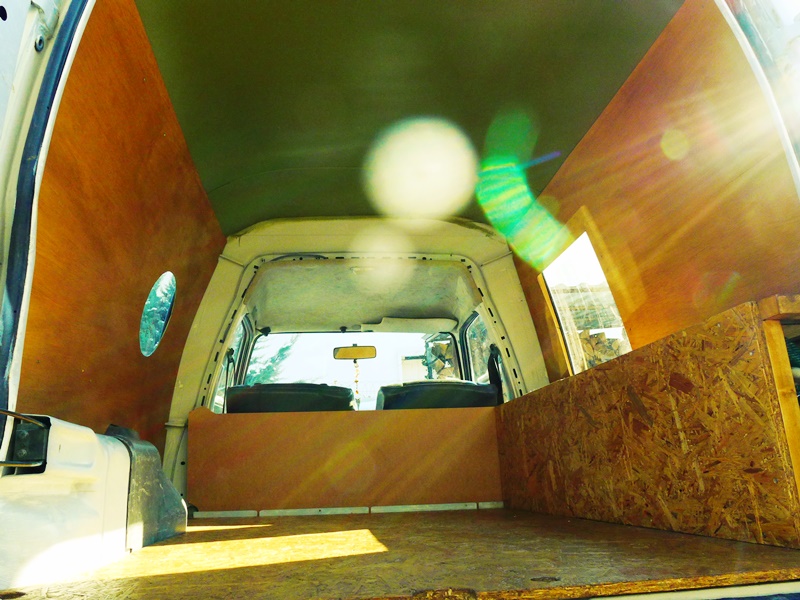 |  |  |
| The floor and sides barnished, the ceiling painted and the windows are (almost) finished. |
We left after four very busy days (for both us and him) and went to say hello to G. and I., to discover their new home in a tiny village about thirty kilometers up in the Sierra de Guara and spend a weekend by the fireplace, cooking, eating and doing the due updates after a looong time without seeing each other.
 |
"Lucky passengers, on behalf of Un(t)raveling,
Futuna welcomes you warmly on board of 2c15" |
The rest of our chaotic route back to France is out of the scope of this page (but anybody feeling like hearing more about it can check this post in Spanish). But in just a few words, let's say we've been working back on 2c15 since we got here. We barnished everything and set it all up to get it ready for the seasonal field work as cattle vets: the sheep, cattle and suicidal boarder collies better be prepared (check the first of three chapters of our vet adventures in French here)! Our calendar for Basque country does not give us much spare time to keep working and there is still some body work to be done (mainly spray painting and anti-rust treatment of the lower part), the left-side trunk and frame, some plywood profiles for the sides and the rear doors, all the power equipment to set and of course the bed frame to finish. Easily another (intense couple of) week(s), if other projects do not disturb us... ha ha ha!
We promise we'll keep posting as we get the rest done, even though it'll sure last longer than expected!
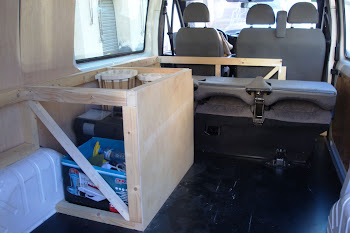
April-May 2015: Hello again! Back home and ready to get back to work on the 2c15. On a weekend spent mostly gardening, we found the time to do some painting and build the left-side trunk. For two reasons, we made it a bit bigger than the right one: first so we can store more stuff in it, then to have a more comfortable seat on the side where the back door tends to stay closed, and finally to reduce the distance between the two sides (now about 95cm). This way, the weight-bearing boards we'll be sleeping on won't suffer too much, and we'll sure sleep much better! So for now, it looks like this:
 |
 |
| Structure of the leftside trunk: in progress and in situ, then almost finished but in the kitchen/workshop! |
 |
 |
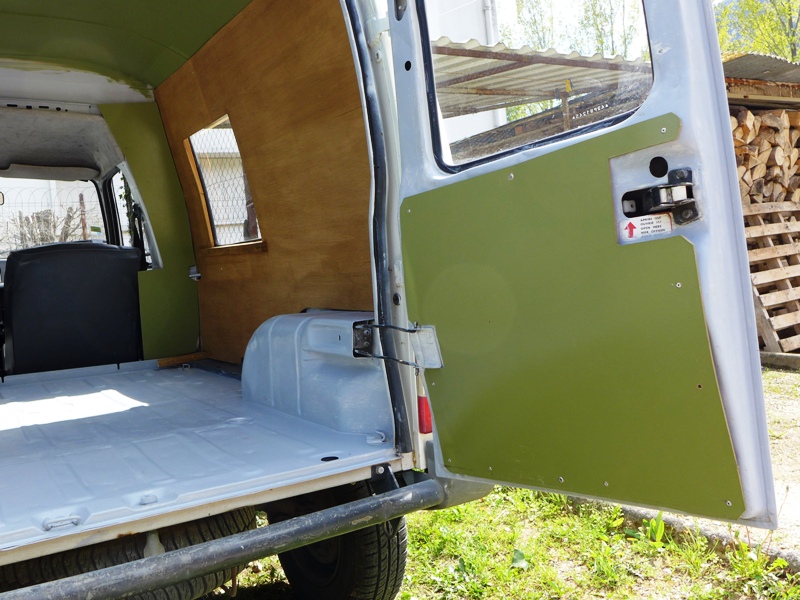
| View of the backdoor panel (everything inside removed for deep cleaning) and left-side trunk complete. |
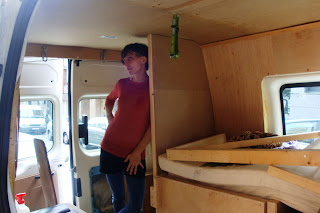
We also cut some 3mm MDF pieces to cover the side and top of the "junction" between the cabin and the rear: as you can see on the pics, the right one is already painted and rivetted to the frame, waiting for the left and top pieces to complete it. Although small, we insulated these parts with salvaged multilayer. Before setting up the left trunk, we had to remove everything, floor inclued, in order to clean properly after taking a lot of garbage from the garden to the junkyard... We closed the back of the left trunk with a piece of plywood that will need either green paint or barnish. The whole trunk needs barnishing and we'll give the floor an extra layer at the same time. On the leftside is the wiring for a main light we'll set on top, as the auxiliary battery will go in the trunk below the "porthole" window... During the last few days, we also cut and rivetted some MDF panels for the rear doors and the "junction", as you can see on this next pic:
 |
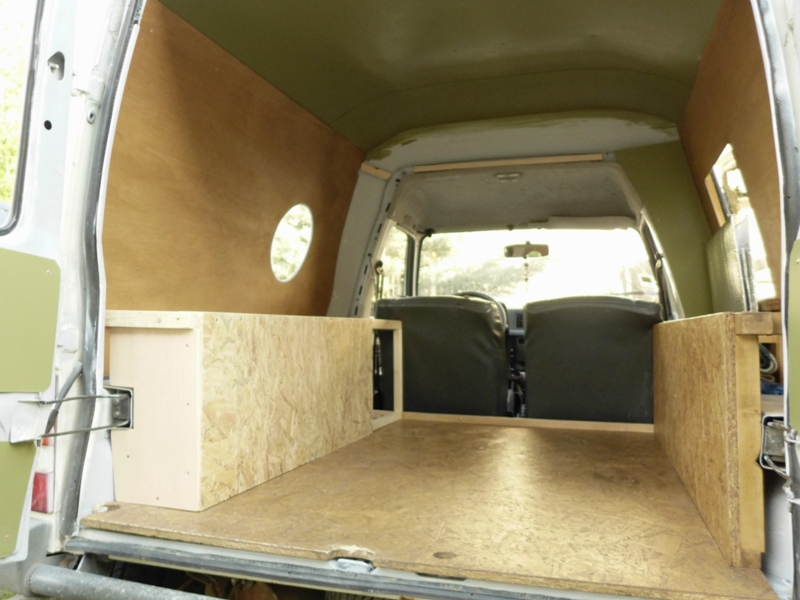
The floor, walls, trunks, ceiling, rear doors and "junction" finished, painted
and barnished: quite a few boxes to tick! We're getting closer... |
August 2015: Now, another couple of months have passed but we've finally completed the bed boards and the lids of the trunks (all cut sanded of the same piece of 20mm plywood, sanded and barnished). There's an extra pannel mounted on hinges (see detail picture) that separates the cabin and back: it can be push-opened backward (while driving), forward with the seats reclined (to extend the sleeping surface and spread legs and feet) or removed and stored behind the seats. We also painted the lowest part of the car, exhaust pipe and inside the wheels included with a thick layer of black bituminous anti-rust protective thick finish/paint - which gives the 2c15 a nice trashy/classy look*...
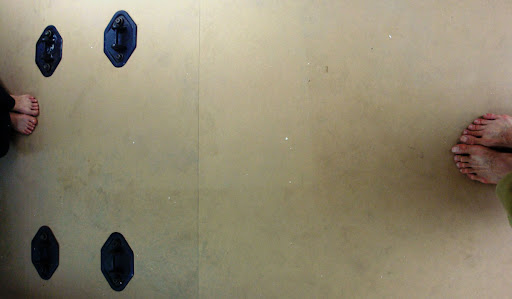
We also figured out a nice and easy way to reinforce the bed boards so they don't break in the middle of the night, or just end up bent like the back of an old horse... We chiseled some small cuts on the trunks' frames, just deep enough to receive the two prepared (thinned, flatenned and sanded ends) metallic "T" bars recycled from a garden fence, which match the long edges of the bed boards and prevents them from bending. Would the roof be higher, you could tap dance on them with no fear! Well, I'm glad you can't try, just in case... All the bulk goes below, climbing, backpacks, water tank and such, while we sleep on top of it. The whole thing is lightweight (sort of) and can be set/removed in about a minute (from inside and with the doors closed, in case of heavy rain). We were pretty surprised to see how much stuff could actually fit inside the trunks (tent, sleeping bags, stove, food, extra clothes and first aid kit, ice poles and crampons, as well as basic tools and some snow chains...), allowing us to live, cook and pack/unpack comfortably... and, yes! it's waaaaaaaaay smaller than the TRANSITion! (see below), but as long as it's sunny and relatively warm, it works pretty well!
 |
 |
 |
| The plywood trunk lids and bed boards just sanded ; then being barnished ; detail of the chiseled cuts for the "T" bars. |
 |
 |
 |
| The whole "bed" with the front pannel down forward ; chiseling off to receive the hinges ; the front pannel up. |
 |
 |
 |
| 2c15 in its new classy/trashy tar black underwear ; the bed "T" bars ; detail of open side trunk open and "T" bar. |
So, it now looks like this and we only need to end with the auxiliary battery and wiring + main light, 12V and 220V sockets, and figure out where to find one of those long sexy roof racks...
To be continued... See ya!
* it's obviously up to you to decide...
_________________________
- since a picture (or a bunch of pictures) is said to be better than a long speech… let us introduce proudly our magic mystery van,
the Ford TRANSITion!

|
 |
| the TRANSITion! a 2006 2.0L 100T300 Ford Transit. |
may 2012: first weekend, near Montpellier: raw style! |
 |
| june 2012: the first steps, floor insulation and 16mm medium cover. |
 |
 |
| detail of the medium floor cover. |
 |
| then, ceiling insulation and 3mm medium cover. |
phase 1 completed (floor, ceiling and light). let's dance! |

|
 |
| july 2012: drawing the wall cover on 5mm wooden panels. |
left-side: wall panels, trunk structure and bed frame. |

|
 |
| detail of the bed frame with rear seat reclined |
first tests for the bed frame. |

|
 |
| rightside trunk to complete the bed frame and trunk/seat. |
detail of the right side trunks with the bed on. |
 |
 |
| the panel from the other side. yes, it's strong enough! |
 |
| september 2012: building the panel between bed and kitchen. |
the bed corner: before (sept 2012) and... |

|
 |
 |
| ...after (may 2013) the papier mâché finish. |
july 2013: homemade kitchen (stove, case and canteen) + stuff. |
october 2013: sticking the mapa mundi on top of the trunks. |
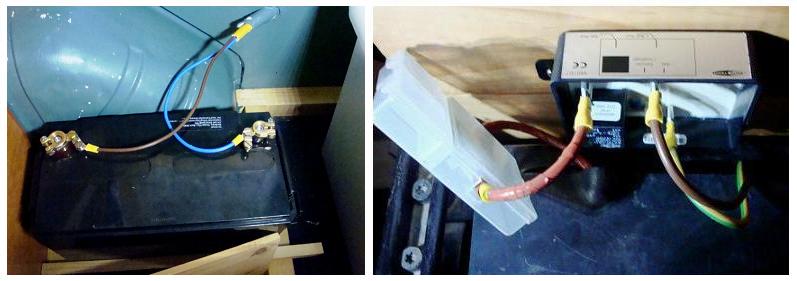 |
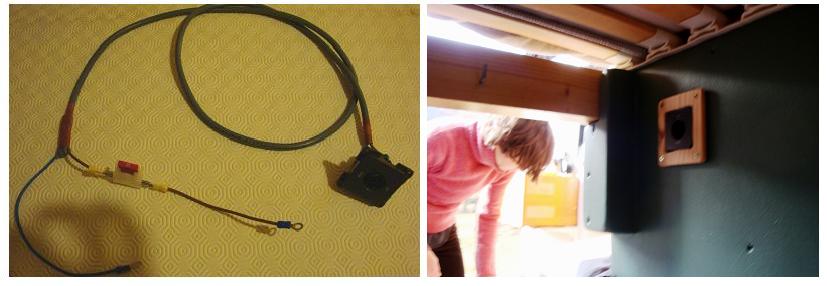
| december 2013: auxiliary battery (in the main trunk) and voltage-sensitive relay (below the driver's seat). |
 |
| wiring of the extra 12V plug with fuse and position under the bed (protected and easy to access). |
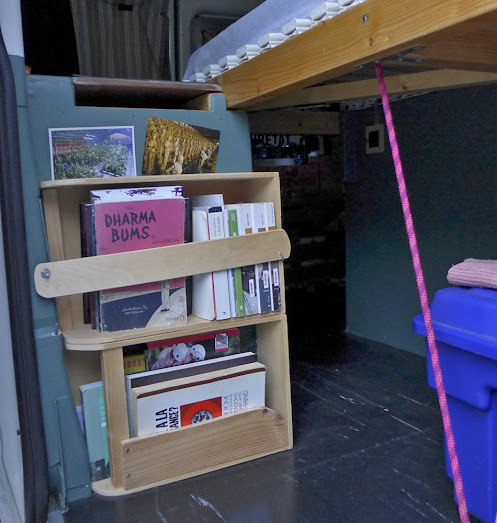 |
| and one final detail (march 2014): the book shelf! |
and to conclude, a few words about the itchy question:
how much did it? well, not sooo much (especially if you compare with the price of an actual VW or Mercedes camper-van, or the job done by a professional). but still, it's money:
- all wooden structures (bed frame, panels, trunks, kitchen, ceiling, floor...): around 600 euros and many recycled elements (wine cases, medium, pallets and such).
- springbed and mattress were recycled from 2 old IKEAs (bed and convertible-sofa).
- the floor is a single piece of natural rubber... almost 140 euros! (mon petit caprice...).
- the oven is a
CampingGaz duo, 55 euros. the
4kg gaz tank costs around 50 euros first time, then 16-to-20 each refill (so far, twice a year only, but should increase significantly now we use it fulltime). We also bought a
23 liter water tank (16 euros) and a great
Sea-To-Summit kitchen sink (20 euros).
- water-based paints for around 30 euros, because we changed our minds several times with the colors!
- polyurethane "yacht" barnish for the wooden structures: around 60 euros (3x 750ml). this barnish is the most expensive but also the one which best resists moist, water, grease, cooking and such...
- screws, nails, hinges and little hardware, probably around 30 euros but i ain't got the count...
- papier maché is litterally free, glu is very cheap and the most expensive was the National Geographic mapamundi we bought 25 euros in Barcelona.
- now about power: slightly more than 300 euros. deep cycle auxiliary battery, 190 euros ; voltage-sensitive relay around 60 euros ; all the wires, fuses and fuse-holders, extra plug and power hardware another 50 euros (including a multimeter to check our batteries' charge).
So, on the whole: around 1000 euros for the whole campervan's structure (including bed, kitchen, stove and most general furniture) and another 300 euros for the extra power. And we certainly can't count hours! But it sure has been an amazing year and half, DIYing, learning, and having fun... In order to complete the note, should be added to this: the yearly ITV (technical inspection) around 50 euros, the insurance (we actually pay 450 euros per year) and annual checking with oil and filter change every 20.000km. This december 2013, we changed the front tyres for another 190 euros.
That's all folks! TRANSITion! is on its track...


No comments :
Post a Comment